# Single Sign-On with OneLogin and njs
Type of document: Tutorial
Product: NGINX Plus
> Learn how to enable single sign-on (SSO) with [OneLogin](https://www.onelogin.com/) for applications proxied by F5 NGINX Plus.
---
**Note:** This guide applies to NGINX Plus [Release 15](nginx/releases.md#r15) and later, based on the [`nginx-openid-connect`](https://github.com/nginxinc/nginx-openid-connect) GitHub repo. Starting with NGINX Plus [Release 34](nginx/releases.md#r34), use the simpler solution with the [native OpenID connect module](https://nginx.org/en/docs/http/ngx_http_oidc_module.html).
See [Single Sign-On With OneLogin](nginx/deployment-guides/single-sign-on/onelogin.md) for details.
You can use NGINX Plus with [OneLogin](https://www.onelogin.com/) and the OpenID Connect protocol to enable single sign-on (SSO) for your proxied applications. By following the steps in this guide, you will learn how to set up SSO using OpenID Connect as the authentication mechanism, with OneLogin as the identity provider (IdP) and NGINX Plus as the relying party.
**Note:** You can find more information about the NGINX Plus OpenID Connect integration in the project's [GitHub repo](https://github.com/nginxinc/nginx-openid-connect#nginx-openid-connect).
## Prerequisites
To complete the steps in this guide, you need the following:
- A OneLogin tenant with administrator privileges.
- [NGINX Plus](https://www.f5.com/products/nginx/nginx-plus) with a valid subscription.
- The [NGINX JavaScript module](https://nginx.org/en/docs/njs/index.html) (`njs`) -- the `njs` module handles the interaction between NGINX Plus and OneLogin identity provider (IdP).
## Install NGINX Plus and the njs Module {#install-nginx-plus-njs}
1. If you do not already have NGINX Plus installed, follow the [NGINX Plus Admin Guide](https://docs.nginx.com/nginx/admin-guide/installing-nginx/installing-nginx-plus/) steps to do so.
2. Install the NGINX JavaScript module by following the steps in the [`njs` installation guide](https://nginx.org/en/docs/njs/install.html).
3. Add the following directive to the top-level ("main") configuration context in the NGINX Plus configuration (`/etc/nginx/nginx.conf`) to load the `njs` module:
```Nginx configuration file
load_module modules/ngx_http_js_module.so;
```
## Configure OneLogin {#config-onelogin}
**Note:** The following procedure reflects the OneLogin GUI at the time of publication, but the GUI is subject to change. Use this guide as a reference and adapt to the current OneLogin GUI as necessary.
Create a new application for NGINX Plus in the OneLogin GUI:
1. Log in to your OneLogin account at **https://**_domain_**.onelogin.com**, where _domain_ is the domain you chose when you created your account.
2. Click Applications in the title bar and then click the Add App button in the upper right corner of the window that opens.
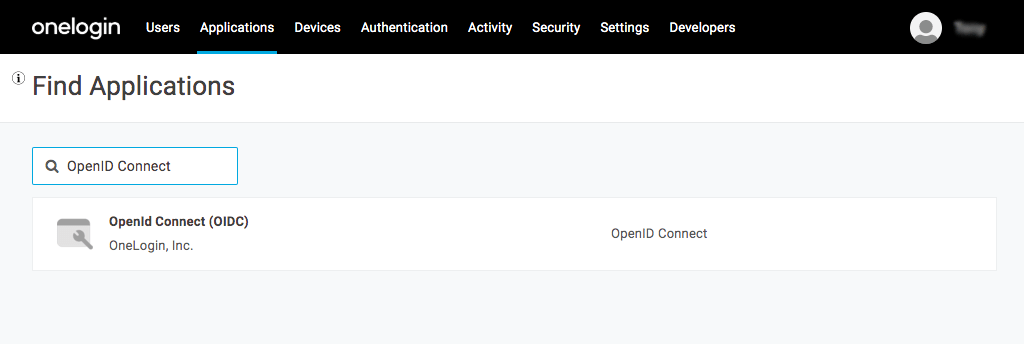
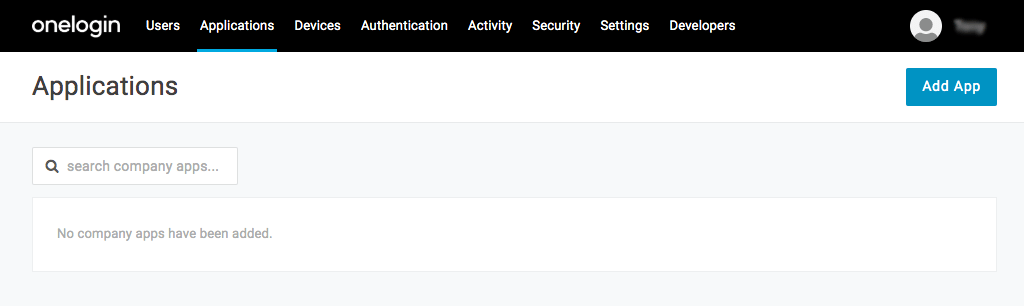 3. On the **Find Applications** page that opens, type **OpenID Connect** in the search box. Click on the **OpenID Connect (OIDC)** row that appears.
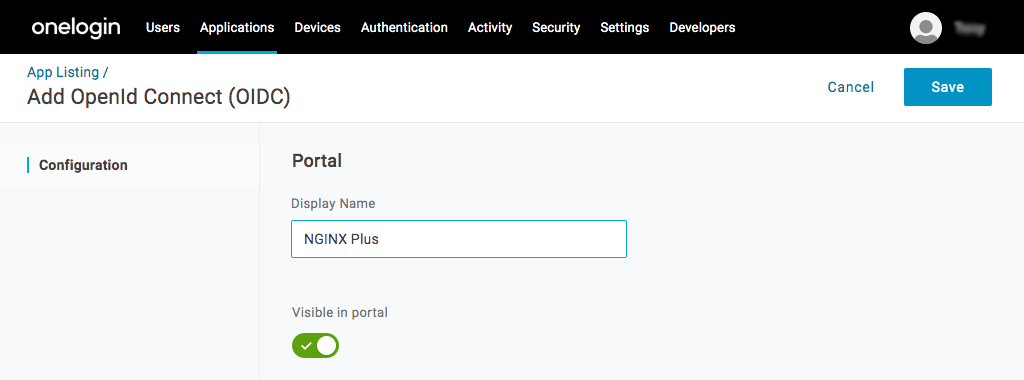
 4. On the **Add OpenId Connect (OIDC)** page that opens, change the value in the **Display Name** field to **NGINX Plus** and click the Save button.
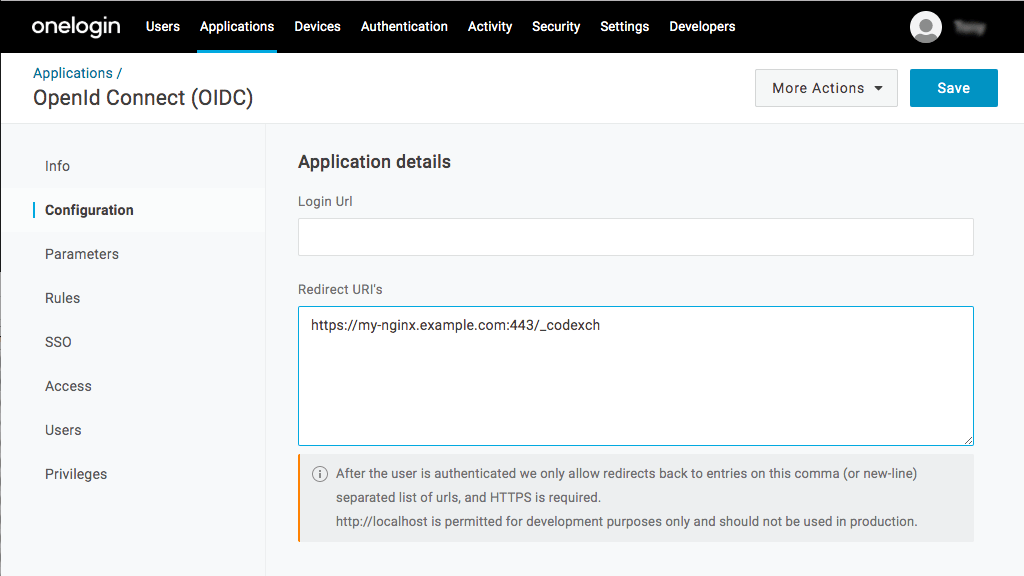
 5. When the save completes, a new set of choices appears in the left navigation bar. Click **Configuration**. In the **Redirect URI's** field, type the URI of the NGINX Plus instance including the port number, and ending in **/\_codexch** (in this guide it is **https://my-nginx.example.com:443/_codexch**). Then click the Save button.
**Notes:**
- For production, we strongly recommend that you use SSL/TLS (port 443).
- The port number is mandatory even when you're using the default port for HTTP (80) or HTTPS (443).
5. When the save completes, a new set of choices appears in the left navigation bar. Click **Configuration**. In the **Redirect URI's** field, type the URI of the NGINX Plus instance including the port number, and ending in **/\_codexch** (in this guide it is **https://my-nginx.example.com:443/_codexch**). Then click the Save button.
**Notes:**
- For production, we strongly recommend that you use SSL/TLS (port 443).
- The port number is mandatory even when you're using the default port for HTTP (80) or HTTPS (443).
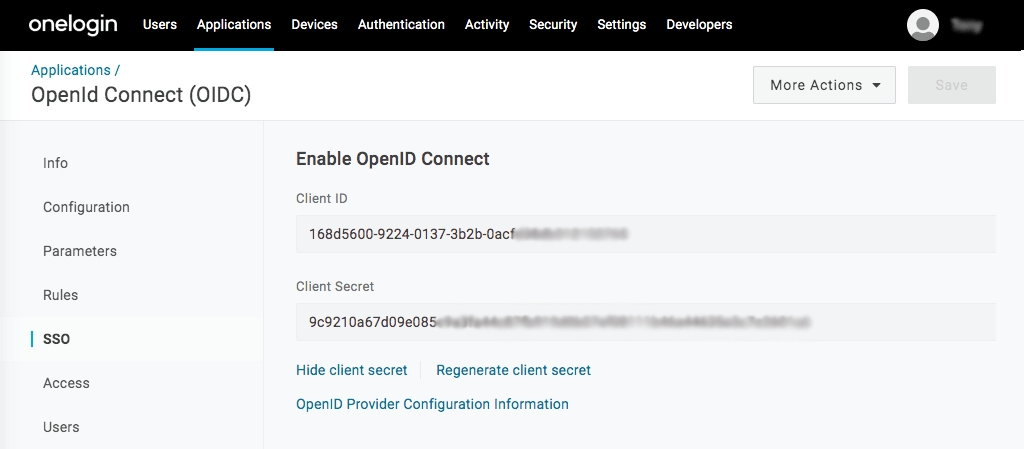
 6. When the save completes, click **SSO** in the left navigation bar. Click **Show client secret** below the **Client Secret** field. Record the values in the **Client ID** and **Client Secret** fields. You will add them to the NGINX Plus configuration in [Step 4 of _Configuring NGINX Plus_](#nginx-plus-variables).
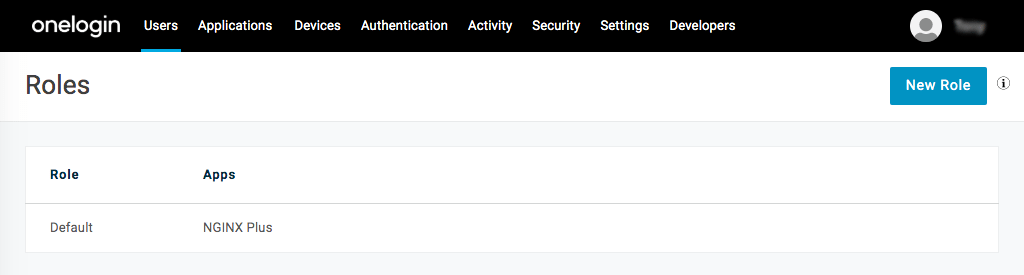
 7. Assign users to the application (in this guide, **NGINX Plus**) to enable them to access it for SSO. OneLogin recommends using [roles](https://onelogin.service-now.com/kb_view_customer.do?sysparm_article=KB0010606) for this purpose. You can access the **Roles** page under Users in the title bar.
 ## Set up NGINX Plus
Take the steps in this section to set up NGINX Plus as the OpenID Connect Client.
### Configure NGINX OpenID Connect {#nginx-plus-oidc-config}
1. Clone the [nginx-openid-connect](https://github.com/nginxinc/nginx-openid-connect) GitHub repository, or download the repository files.
```shell
git clone https://github.com/nginxinc/nginx-openid-connect.git
```
1. Run the _configure.sh_ script to update the NGINX configuration files with the values for your OneLogin application.
For example:
```bash
./nginx-openid-connect/configure.sh \
--auth_jwt_key request \
--client_id 168d5600-9224-... \
--client_secret c9210a67d09e85... \
https://.onelogin.com/oidc/2/.well-known/openid-configuration
```
2. In the `frontend.conf` file, update the **my_backend** upstream with the address of the application that you want to add OIDC authorization to.
For example:
```Nginx configuration file
upstream my_backend {
zone my_backend 64k;
server my-backend-app.com:80;
}
```
3. In the _openid_connect.server_conf_ file, add the [`proxy_set_header`](https://nginx.org/en/docs/http/ngx_http_proxy_module.html#proxy_set_header) directive to the `/_jwks_uri` and `/_token` locations to `Accept-Encoding "gzip"`, as shown below.
```Nginx configuration file
...
location = /_jwks_uri {
...
proxy_set_header Accept-Encoding "gzip"
}
...
location = /_token {
...
proxy_set_header Accept-Encoding "gzip"
}
...
```
4. Copy the following files to the _/etc/nginx/conf.d_ directory on the host machine where NGINX Plus is installed:
- `frontend.conf`
- `openid_connect.js`
- `openid_connect.server_conf`
- `openid_connect_configuration.conf`
5. Reload the NGINX configuration:
```bash
sudo nginx -s reload
```
## Test Your Setup
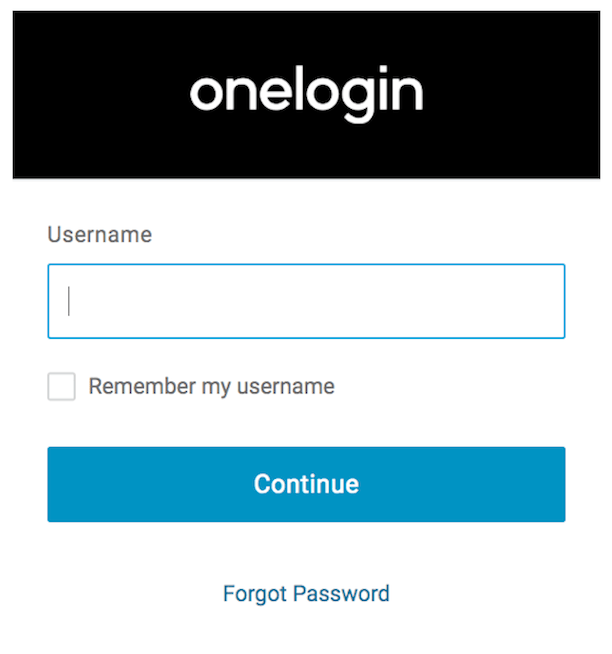
In a browser, enter the address of your NGINX Plus instance and try to log in using the credentials of a user assigned to the application (see [Step 7 of _Configuring OneLogin_](#onelogin-roles)).
## Set up NGINX Plus
Take the steps in this section to set up NGINX Plus as the OpenID Connect Client.
### Configure NGINX OpenID Connect {#nginx-plus-oidc-config}
1. Clone the [nginx-openid-connect](https://github.com/nginxinc/nginx-openid-connect) GitHub repository, or download the repository files.
```shell
git clone https://github.com/nginxinc/nginx-openid-connect.git
```
1. Run the _configure.sh_ script to update the NGINX configuration files with the values for your OneLogin application.
For example:
```bash
./nginx-openid-connect/configure.sh \
--auth_jwt_key request \
--client_id 168d5600-9224-... \
--client_secret c9210a67d09e85... \
https://.onelogin.com/oidc/2/.well-known/openid-configuration
```
2. In the `frontend.conf` file, update the **my_backend** upstream with the address of the application that you want to add OIDC authorization to.
For example:
```Nginx configuration file
upstream my_backend {
zone my_backend 64k;
server my-backend-app.com:80;
}
```
3. In the _openid_connect.server_conf_ file, add the [`proxy_set_header`](https://nginx.org/en/docs/http/ngx_http_proxy_module.html#proxy_set_header) directive to the `/_jwks_uri` and `/_token` locations to `Accept-Encoding "gzip"`, as shown below.
```Nginx configuration file
...
location = /_jwks_uri {
...
proxy_set_header Accept-Encoding "gzip"
}
...
location = /_token {
...
proxy_set_header Accept-Encoding "gzip"
}
...
```
4. Copy the following files to the _/etc/nginx/conf.d_ directory on the host machine where NGINX Plus is installed:
- `frontend.conf`
- `openid_connect.js`
- `openid_connect.server_conf`
- `openid_connect_configuration.conf`
5. Reload the NGINX configuration:
```bash
sudo nginx -s reload
```
## Test Your Setup
In a browser, enter the address of your NGINX Plus instance and try to log in using the credentials of a user assigned to the application (see [Step 7 of _Configuring OneLogin_](#onelogin-roles)).
 ## Troubleshooting
Refer to the [Troubleshooting](https://github.com/nginxinc/nginx-openid-connect#troubleshooting) section in the `nginx-openid-connect` repository on GitHub.
### Revision History
- Version 3 (May 2022) - Updates OneLogin's OpenId Connect API endpoints from version 1 to version 2
- Version 2 (March 2020) – Updates to _Configuring NGINX Plus_ section
- Version 1 (July 2019) – Initial version (NGINX Plus Release 18)
## Troubleshooting
Refer to the [Troubleshooting](https://github.com/nginxinc/nginx-openid-connect#troubleshooting) section in the `nginx-openid-connect` repository on GitHub.
### Revision History
- Version 3 (May 2022) - Updates OneLogin's OpenId Connect API endpoints from version 1 to version 2
- Version 2 (March 2020) – Updates to _Configuring NGINX Plus_ section
- Version 1 (July 2019) – Initial version (NGINX Plus Release 18)